Getting started
Loft conversions can be the ideal way to add space to a house without extending its footprint. Whether it is a growing family, a new hobby or the need for a dedicated home office space, a loft conversion is often the perfect solution for those wanting to squeeze the most space out of their existing homes. Our guide to converting a loft includes advice on everything from costs and planning permission to the best design ideas for your project.
Loft conversions are a particularly useful solution where planning permission for an extension is likely to be difficult, or in built-up urban areas where there simply isn’t the external space. It is also worth bearing in mind that, according to Nationwide, an additional bedroom and bathroom has the potential to add around 20% to the value of a typical three-bedroom, one-bathroom house.
Can my loft be converted?
Some lofts are more suitable for conversion than others. Tricky loft conversions can be costly and disruptive so it is important to ensure the finished product is a useful space and/or adds the value you hoped to achieve. Factors that determine whether or not your loft can be converted include:
Available head height
Head height needs to be measured from the top of the floor joists in the loft, to the underside of the ridge beam. Although the building regulations permit head heights of 2.2m, a far more comfortable height once a new floor covering has been laid and the ceiling finish has been applied is 2.4m.
The roof pitch
Generally, the steeper your roof pitch, the easier the loft conversion will be, with most angles above 30 degrees working best. And the steeper the roof pitch, the more head height will be available (see above).
Type of roof structure
There are two main types of roof structure: a cut roof, or trussed. A quick peek in your loft will reveal which you have, with the majority of houses built before the 1960s having cut roofs. Those built from the late 1960s onwards usually have trussed roofs.
A cut roof uses rafters, joists and purlins and leaves the majority of the triangular space below free. A trussed roof uses W-shaped trusses (or supports) that provide a braced support and run through the cross section of the loft — effectively blocking some of the void that you will need in order to create a usable space. Both are convertible but will require different approaches.
Work with a structural engineer and qualified builder to ensure that the opposing roof slopes in a trussed roof are fully supported and tied together at the base (usually done with new floor joists) as well as close to the apex with new collars. Sometimes, steel beams are placed between load bearing walls for the new floor joists to hang on and the rafter section to be supported on — along with a steel beam at the ridge. This new structure must be put in place before any of the old trusses are cut.
You might also find that the rafters may require strengthening — this is often undertaken by doubling them up with new ones fixed alongside, or by using sheets of oriented strand board to act as a windbrace.
Water tanks and chimney stacks located in the loft
If your water tank is located in the loft you will need to find a new spot for it. Alternatively, you may wish to consider getting rid of the tank entirely, opting for a mains-fed combination boiler or pressurised unvented hot water cylinder instead. This can be located elsewhere in the house (such as in an airing cupboard).
If there is a chimney stack in your loft then you may wish to remove it to make more space. It is vital that you consult a structural engineer and employ the services of a good builder in this case. While this is undoubtedly a job that will add to costs and timescales, it won’t prevent you from converting your loft. If you adjoin a neighbour, check how this may affect their structure and complete any party wall requirements.
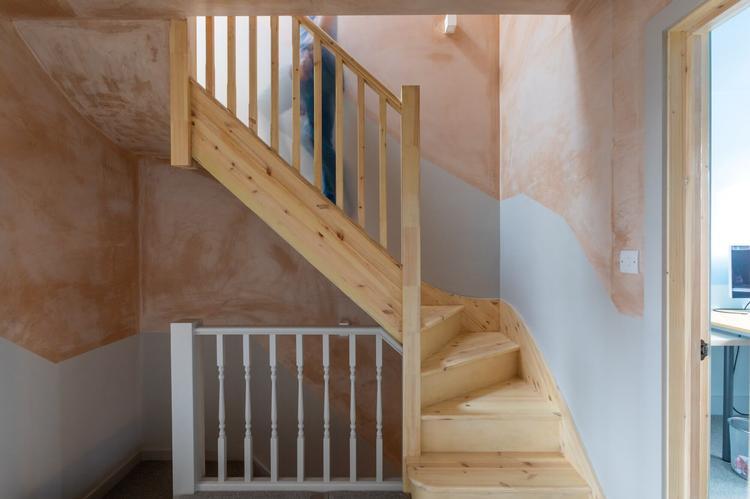
Available head space for staircase
Even if you have the required amount of headspace available in your loft, you may run into difficulties if you don’t have enough space for a staircase up to it. The building regulations require a minimum of 1.9m of headroom at the centre of the flight, and 1.8m at the edges (where there will be sloping roofs). You will also need to allow space for the staircase on the floor below.
There are many variations which will affect cost, timescale and the amount of work involved.
Consulting a good builder, loft specialist, architect or design and build company should be one of the first things you do in order to work out the costs and viability of the project.
Loft conversion types
There are five main loft conversion types that tend to be used in the UK. The loft conversion type you opt for should depend on your existing roof structure and shape, how much you want to spend and will, on some occasions, be dictated by planning restrictions. As well as the information below, the FMB have a webinar that explains what type of loft conversion might be right for your house. However, a builder, house designer or your chosen loft conversion company will be able to advise you further.
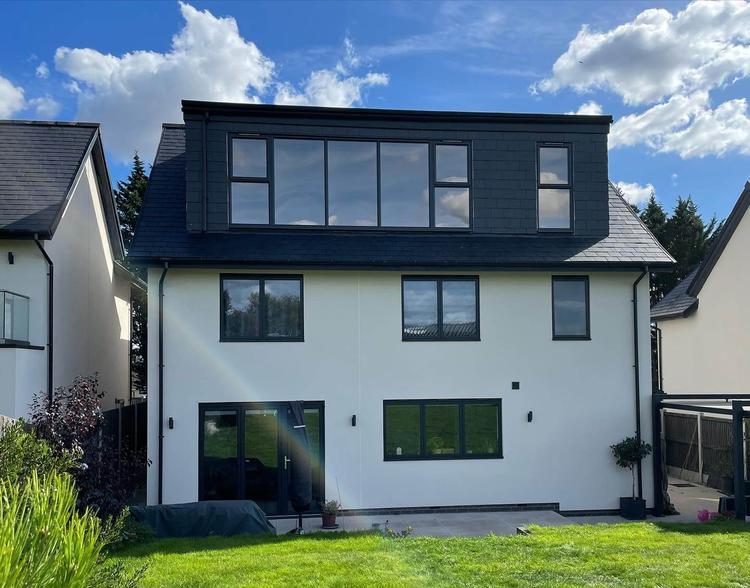
Dormer loft conversion
A flat roof dormer loft conversion is a popular choice for many people, being one of the simpler and more cost effective types of loft conversion out there.
A dormer loft conversion projects out vertically from the sloping section of the roof and uses standard windows — as opposed to rooflights. They can span the entire width of the roof, or simply feature a couple of smaller dormer windows spaced at regular intervals. This is a great way to add headroom, with its box-like structure creating an easy-to-use space with flat ceilings and walls.
While not always aesthetically pleasing compared to other types of conversion, they can fall under permitted development.
A gabled dormer, where the roof has a pitched roof as opposed to flat, is more visually appealing but might be a little more expensive and limit internal headroom.
Mansard loft conversion
A mansard loft conversion is almost like adding an entire new storey to a house and is ideal for period properties and for loft conversions on terraced houses. Bear in mind that the party wall between houses will usually need to be raised and suitable agreements required.
A mansard loft conversion involves altering the roof structure of a sloped roof, giving it an almost vertical wall – usually 72 degrees. The roof remains flat and windows are inserted into the new roof structure. Most mansard conversions span gable wall to gable wall.
Mansard loft conversions are most commonly added to the rear of houses, but they can be added to the side and front too. Double mansard roofs are also possible, where they are added to both the front and rear of the house.
Those after loft conversions with en-suites or attic conversions should consider this style of conversion. A mansard loft conversion is usually more expensive than other types of loft conversion, taking more time and, in the majority of cases, requiring planning permission.
Roof light loft conversion
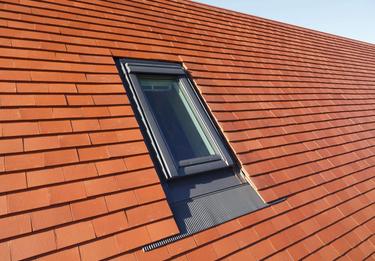
A roof light loft conversion will almost certainly be the cheapest way to convert a loft. The existing space remains just as it is, with roof windows added. The floor will need to be reinforced and stairs added. Electrics, plumbing and insulation will also be required for the space to become habitable.
Roof lights are an easy way to draw in natural light and provide ventilation, with relatively minimal disruption to your existing living space.
The frame of the roof lights will be fitted into a new opening in the roof, before flashings are added and the tiling made good around the new window.
This is a good option for small loft conversions or simple loft bedrooms — although remember that a minimum of 2.25m of head height in the centre of the room will be required in order to properly build up the floor. It may also be necessary for the new loft stairs to come into the centre of the room due to limited headroom.
In most cases, a roof light loft conversion won’t require planning permission (although it may if the roof lights will be at the front of the house).
Hip to gable loft conversion
Those looking for ideas for loft conversions for bungalows, or for a semi-detached house, could consider a hip to gable loft conversion. In layman terms, a hip to gable loft conversion straightens the slanted (hipped) end of a roof in order to create a vertical wall (the gable end).
The existing roof is taken back and the end wall built up to form the new gable with a standard pitched roof. This creates a good space internally with full headroom.
The creation of this new vertical wall means standard window openings can be added for natural light.
Modular loft conversions
Ready-made loft conversions, often made up using a steel frame, are fabricated off-site before being craned into position — after the roof of the house has been taken off. Many modular loft companies can organise planning permission approval on your behalf.
This type of loft conversion is quick and requires little in the way of on-site labour – you can even choose packages which include doors, windows, electrics and bathrooms. Some modular lofts come complete with a Building Regulations certificate and a Part P Electrical certificate too. Accurate measurements and planning will be required to ensure a good fit and smooth installation.
Adding a bathroom in a loft conversion
If you want a bedroom loft conversion then you may well be considering installing an ensuite or bathroom in your loft too.
Naturally this will add to costs, disruption levels and timescales, and you will certainly need an experienced builder and plumber to carry out the work for you to the required building regulation standards. Tell your builder early on if you are thinking about a bathroom loft conversion. The main issues with bathroom loft conversions are:
- Getting water at a good pressure up to the loft.
- Carrying waste water away and down from the loft.
- Reinforcing the floor to take the weight of sanitaryware.
Check with your builder and structural engineer that the bathroom floor is constructed to deal with flooding, damp conditions, and leaks. A marine grade plywood will be required, along with a waterproof tile backing board on the walls.
Choosing a builder
Choose a builder who can advise you on all aspects of your loft conversion. Consider the rapport you have with the builder, their experience in loft conversions, client feedback and always check for valid insurance to the level of cover required.
Use our Find a Builder tool to find a Master Builder for project. FMB members are experts in their field: professionals who have been thoroughly vetted and independently inspected on site to ensure they meet the high quality standards.
Aim to get at least three quotes before choosing your builder — and remember that cheapest is not always best. Read our How to choose a builder guide for tips on making the right choice for your project.
Do I need planning permission for my loft conversion?
If you live in a listed building you will require Listed Building Consent and those living in a designated area, such as Conservation Area, Area of Outstanding Natural Beauty or National Park will usually need to apply for planning permission.
A loft conversion being carried out in England should not require planning permission providing:
- The new roofing does not add more than 40m3 of space for terraced houses, or 50m3 on detached and semi-detached houses. Bear in mind that any previous roof extensions that have been made will count towards this allowance.
- The extended space does not go beyond the plane of the existing roof slope facing the highway.
- No extension is higher than the highest part of the existing roof.
- There are no raised platforms or balconies.
- New roofing materials are either an exact match for, or very close to, the original.
- Side facing windows feature obscured glazing and an opening that is 1.7 metres above the floor.
- Dormers or any other extensions (except hip-to-gables) are set back at least 200mm from the original eaves – unless this is impossible.
- Any extensions do not overhang the outer face of the original wall of the house.
If any of the above guidelines are not met you will need to apply for planning permission through your local Council. Your builder, architect or loft conversion specialist should be able to advise you on whether you will require planning permission and could help you to secure it too.
Wales and Scotland: In Wales and Scotland, there are similar conditions surrounding planning, full details of which can be found on the planning section of the Welsh Government and Services website or at mygov.scot respectively.
Northern Ireland: Those converting a loft in Northern Ireland should head to the nidirect Government Services website.
You can find out more in our detailed guide to planning permission or on the LABC’s Front Door website.
What building regulations do I need to consider?
When it comes to loft conversion building regulations there is one rule you need to know – loft conversions always need building regulations approval, irrespective of whether planning permission is required. Your builder, architect or loft conversion specialist will help to prepare building regulations plans, structural specifications and calculations and, ultimately, ensure the project complies with building regulations to ensure you get approval.
What do the regulations state?
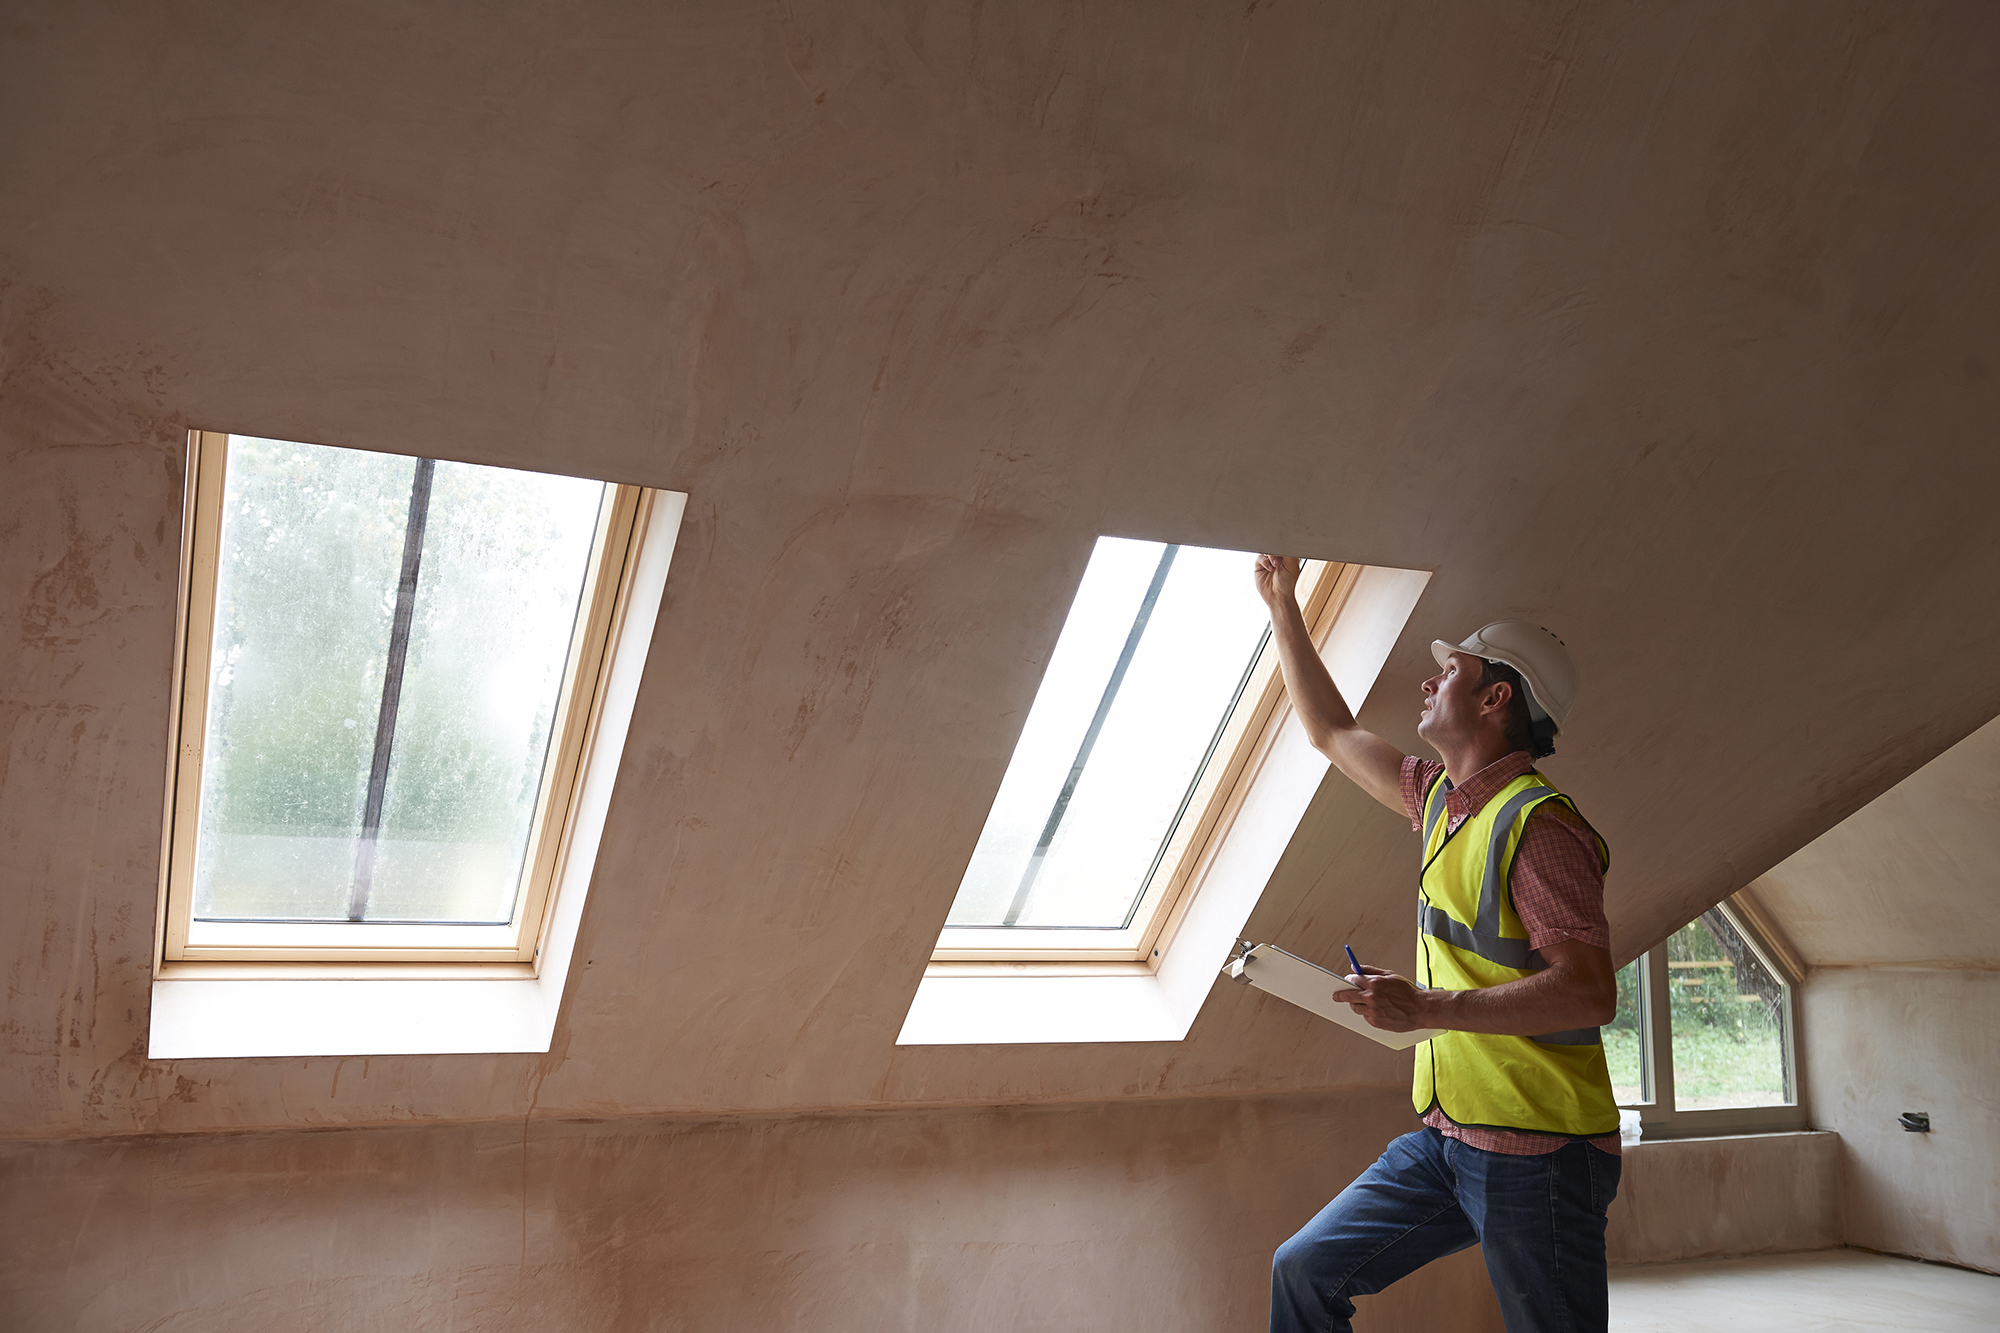
- New windows need to be big enough to escape from in the event of a fire, meaning that egress window openings will be needed to serve all first floor habitable rooms (not bathrooms). The openings should be at least 450mm x 450mm and at least 0.33m2 in area. The bottom of the opening of rooflights (these should usually be top opening) should be between 800mm and 1,100mm from the floor.
- If your loft conversion adds a third storey then you will need to ensure that a protected stair enclosure leads down to the exterior exit door. If your staircases rises from a room that is not the hallway, you have a couple of options.
- Keep the staircase entirely enclosed within a hallway that leads to an external door or.
- Enclose the staircase in a lobby at the base of the door. The lobby should have two doors offering a choice of front or rear escape. The doors and lobby walls should be fire-resistant.
- In the case of open plan homes, the staircase may land in an open plan space, meaning a sprinkler system will likely be required.
- Fire regulations state that the new floor joists in your loft conversion will have to offer a minimum of 30 minutes fire protection — meaning that the ceilings in the rooms below may need to be replastered. Fire safety makes up a large part of loft conversion building regulations and an experienced builder should be well-versed in the regs.
- The loft room will need to be separated by a fire door located either at the top or bottom of the new staircase.
- Existing doors on the stair leading to the ground and first floor need to provide 20 minutes of fire resistance and can’t be glazed (unless the glass is fire-rated).
- Mains powered smoke alarms will be required on each floor of the house, interlinked so that they are all activated when one goes off.
Other building regulations relating to lofts
- Floors and beams: New floor joists will usually be needed in order to support the weight of the new room. Extra joists will need to be added to comply with building regulations and a structural engineer should be brought in to assess the separation distance required between joists to support anticipated load weight. They should work alongside your chosen builder and specify the size and grade of joist needed. The new joists will run alongside the existing ones, and span between load-bearing walls.
- Sound proofing: Sound insulation will need to be incorporated.
- Staircase: As well as the fire regulations that apply to the staircase (see above), there are other regulations relating to staircases that will need to be adhered to.
- Wall construction: New walls will need to support existing or new roof structures effectively, particularly where existing supports are being removed.
- Windows: See above for information on fire safety and new windows in your loft conversion.
- Bathroom: If installing a bathroom, building regulations concerning plumbing and electrics, as well as ventilation will come into play.
- Electrics: Your new electrics must conform to Part P of the building regulations and the 17th Edition Electrical Regulations. Sometimes it will be necessary to fit a new consumer unit or additional units if the existing unit doesn't have the required capacity. Use a qualified electrician for the job to ensure you can be issued with the necessary certificate on completion — head to the FMB’s find an electrician tool for this.
- Thermal insulation: Your new space will need to meet insulation requirements as set out in the building regulations and there are two ways of doing this — either cold roof insulation or warm roof insulation. Your building control inspector will specify which one you will require.
If you live in a semi-detached or terraced house, you will also need to comply with the Party Wall Act 1996. You can find full details in our guide to Party Wall Agreements.
A building control officer will visit to inspect the work at various stages. On the final inspection they will issue you with a completion certificate.
For a more detailed look at the regulations, see our comprehensive guide to building regulations.
How long does a loft conversion take?
How long your loft conversion takes depends on the size of the project, your builder’s availability (do they have a large team, or work on multiple projects?) the availability of supplies and season – winter weather can slow things down. Speak to your builder and make sure you have an agreed project deadline in writing, with an agreed contingency plan for any delays.
It can help to know what’s involved with each stage of the conversion to understand how long things will take and what elements are dependant on each other.
Planning your project:
- Assessing Suitability: Before diving in, ensure your roof can handle the conversion. Consult builders, surveyors, or architects for an expert opinion.
- Crafting Your Vision: Work with a designer or builder to develop detailed plans reflecting your desired use and layout.
- Seeking Approvals: Start your research with our guides to building regulations, party wall agreements, planning permission and permitted development to ensure your project complies with local requirements.
Selecting your team:
- Finding the right builder: Compare quotes from at least three qualified builders with experience in loft conversions. FMB’s Find a Builder search tool can help you find vetted and independently inspected builders in your area that specialise in loft conversions.
- Signing on the dotted line: Secure your chosen builder with a written contract, outlining the schedule and finalising the work plan.
First fix:
- Preparation & demolition: Clear the loft space, dispose of unnecessary elements like water tanks, and reroute any existing electrical or plumbing services.
- Creating the framework: Your builders will install new floor joists for stability, followed by essential wiring and pipework infrastructure.
- Insulating for comfort: Talk to your builder about installing proper insulation throughout the floor and roof to meet building regulations and maximise energy efficiency. Especially speak to them about cooling – as loft conversions can get warm in summer.
- Structural reinforcement: The builders will strengthen your rafters to handle the additional weight, allowing for the removal of redundant structural elements.
- Adding character: If dormer windows are part of your vision, now's the time for their installation. Alternatively, stylish rooflights can introduce natural light.
- Providing access: Choose a staircase that fits the style of your home to seamlessly connect your new loft to the rest of your home. Your builder will be able to show you some options.
- Weatherproofing the shell: Your build team will fix the external cladding and roof covering, making the new space watertight and weatherproof. Windows will also be fitted at this stage.
- Partitioning your space: Your builders will construct the internal walls, typically with timber studwork, insulation, and plasterboard for a smooth finish. : If your loft boasts an en-suite, ask your builder to ensure the fabric of this room includes water-resistant materials (such as moisture-resistant plaster board).
- Plumbing & electrical upgrades: The water and electricity supply will need to be extended to the loft extension, and you may need to replace your boiler if its capacity is not sufficient to supply the new rooms.
- Access & practicalities: Ask your builders to install access panels for hidden services like wall-mounted bathroom fittings and consider under-eaves storage solutions.
Second fix:
- Painting the picture: Walls will be plastered, adding a skim coat along with architrave and skirting boards for a polished look.
- Bathroom bliss: Your builders will install an extractor fan to meet building regulations, whilst you have free rein with choosing some beautiful tiles and sanitaryware.
- Connecting the dots: Complete the second fix of electrical and plumbing systems, including radiators, switches, and sockets.
- The grand finale: Add your personal touch with final decoration, transforming your loft into a unique and inviting space.
Note: Depending on the specific design and complexity of your loft conversion, some elements might overlap or occur differently. This breakdown serves as a general guide.
Loft conversion costs
Loft conversion costs vary a great deal, so it’s important to get three quotes in and ask the builders to provide a detailed breakdown of costs. This will help you to compare quotes easily and identify where price differences are happening.
Factors shaping your loft's price tag:
- Your vision is key: What's the end goal for your loft? Will it be a luxurious master suite, a home office, or a hangout for teenagers? The purpose can impact the complexity and cost.
- Location, location, location: North or south, town or country – regional variations in labour and material costs play a role.
- Planning permission pitfalls: Factor in the cost of submitting a planning application, if required.
- DIY or delegate? Your involvement level influences costs. Will you take on painting and decorating, installing floors or tiles, or leave it to the professionals?
- Design details matter: Simple skylights or dormer windows? Bespoke built-in storage or simple shelving? Each design choice affects the price tag.
- Roof realities: Your roof's type, size, and condition influence the complexity and cost of conversion.
- Energy efficiency: Your builder can advise on whether your existing boiler and electrical systems need upgrading to support your new loft space.
From inspiration to informed decisions:
- Get inspired: Get ideas from real-life projects from FMB members to understand achievable features and their costs.
- Write a detailed brief: It’s worth investing your time in creating a detailed brief for your builder, including plans if possible. This ensures accurate quotes and avoids misunderstandings.
- Think about funding: Your quotes may guide your financing options, whether using savings, equity release, or exploring other avenues. Check out our guide to funding your loft extension for more ideas.
By understanding these factors and taking an informed approach, you'll be well-equipped to transform your loft vision into a reality that fits your budget and dreams.
If you’re shopping around for a good deal on your fixtures and fittings, don’t forget to take a look at our latest Home Picks 2023 buying guides for the independent reviews of the best double glazing companies. Or if you're upgrading your heating system, take a look at reviews for the best combi boilers, the best air source heat pumps and the best ground source heat pumps in the UK.
Check whether your quote includes:
- Design services
- Bathroom sanitaryware and installation
- The removal or repositioning of water tanks or chimney stacks
- Radiators or underfloor heating
- Windows and doors
- Plaster finish
- Final flooring finish (carpet etc)
- Lighting
- Decoration
- Planning fees
- Building control fees
- Any necessary roof repairs
Be sure to ask your builder what your final quote will include so that you are both clear on what is expected. Some quotes will go so far as to include final decoration and door and window hardware, while others only cover the basics. Don’t forget to factor in VAT and fees for building regulations and planning permission too.
Finally, having a detailed brief and detailed plans will ensure a more accurate quote from your builder as opposed to a vague estimate that may well change.